Article: How to Set Up Alvantor Bubble Tent

How to Set Up Alvantor Bubble Tent
SET UP INSTRUCTION
1.Slide the black band off. (Store the band somewhere you will remember. You will need the band when folding the tent later.)
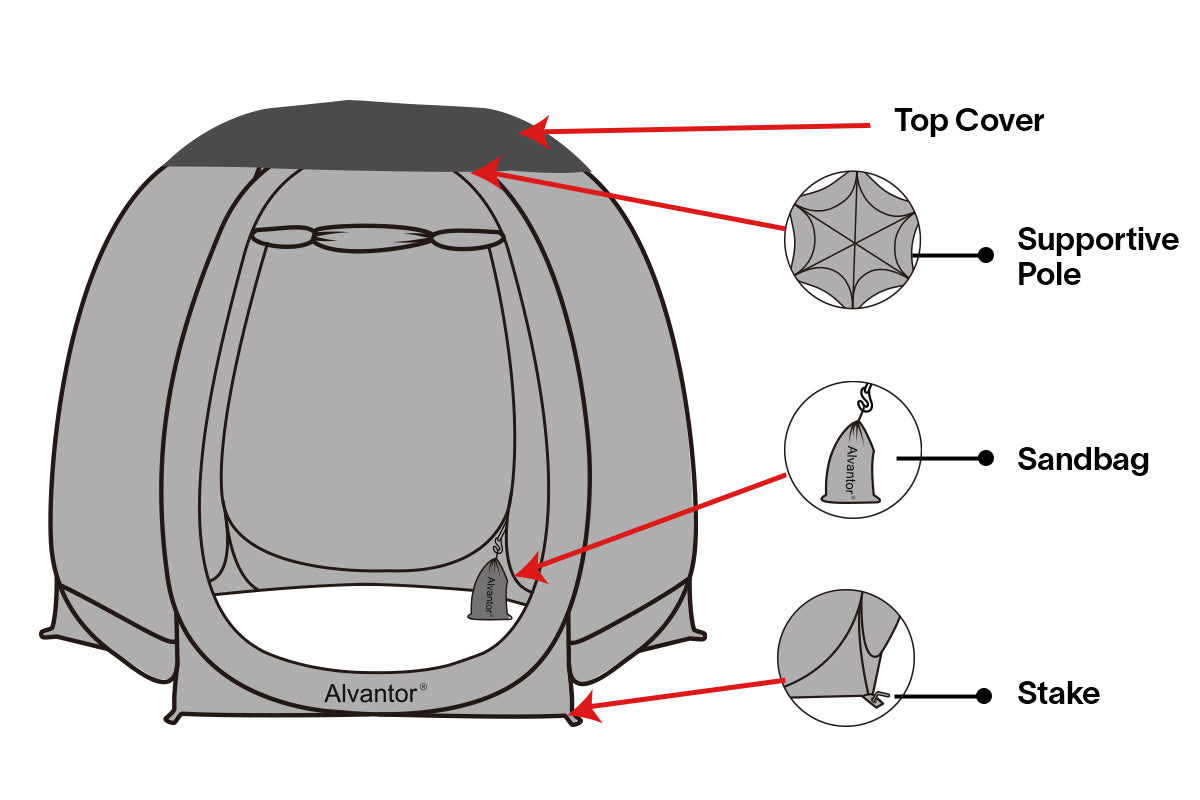
2.Open each panel and spread each side equally for best stability. Add supportive poles on top.
3.Stablize tent with metal stakes in each corner through the metal rings. You need sandbages and guylines to get more stability and windproof. Use the top cover to get full waterproof in rainy days.
TAKE DOWN INSTRUCTION
1.Remove fixated poles from the top.
2.Push side panels inside to overlap each other.
3.Twist the circles into an 8 shape.
4.Fold two sets of small circles face to face together.
5.Slide the band around the tent to hold in place for storage.
IMPORTANT NOTICE
1.To get complete stability and the best wind resistance, you will need to do ALL of the following things:
-Insert the detachable support poles into the pockets on the top. Be sure to insert the pole to the end completely and leave no gap inside the pocket. Please oblique to the pockets then adjust the poleto the middle and upright. When iinserting the end of the roof poles, please pay attention to the oyher side of the pole. Failure to do this may cause punctures or cuts to your gazebo.
-To prevent your bubble tent from blowing away and collapsing, make sure to properly use ALL included guylines. The correct way is both as following.
(1)Guylines are attached to the top AND bottom of every outside corner.
(2)Guylines are meant to be spread out away from the gazebo, not close to the base.

-Use the sandbags. You can either tie it with guylines or put it inside the bottom pockets at each corner. But Please note that it is not enough to use sandbags only. Sandbags can only provide stability in the vertical direction, not in the horizontal direction. which can only be secured by guylines.
-You need to pull all TOP and BOTTOM guylines in right angles to get 360 degrees protection. Failure to use all guylines correctly may cause damages that are not covered by the warranty.
-Stabilize the tent with metal stakes in each corner through the metal rings if possible.
-Use optional purchased Alum pole to get more snow-proof and wind-proof.
-The bubble tent leak when wet. Add the top cover to get full waterproof for the upper part of the tent. Please note that some sewn lines in the lower part of the door zipper and tent may be still leaky in rain. You may purchase a Silicone waterproofer in a spray bottle to get more water proof easily. Please do not let the fabric attached to the tent wall to prevent get wet on rainy days. Failure to do that may cause your furniture to wet witch is not covered in the warranty.

2.Since it is hard to predict the cold temperature and snow volume, we do not recommend to use and leave the bubble outside in freezing and snowy weather.
-DO NOT assemble or disassemble tent in freezing temperatures OR if plastic seems brittle or stiff.
-If you expect to use the tent in freezing or snowy weather, it is required to pull ALL TOP and BOTTOM guylines and use our sunshade/ snow cover accessories. Without these accessories, you may damage the roof when brushing snow off. In cold weather, please note the clear material is FRAGILE. To prevent accidental rips, tears, or other. Please make sure to exercise caution when removing snow from the roof. Snow should be removed ONLY by gently brushing the top of the tent. Never should snow be removed from the inside.
-Failure to pay attention above may cause damages that are not covered by warranty.
3.Do NOT recommend use when the wind force reaches level 6 (10.8-13.8 m/s).
-Since it is hard to know the wind speed, we do not recommend using the tent on a balcony in a high building. For the deck on the second floor or rooftop, please double secure the stability and make sure not to use over windproof limitation.

Leave a comment
This site is protected by hCaptcha and the hCaptcha Privacy Policy and Terms of Service apply.